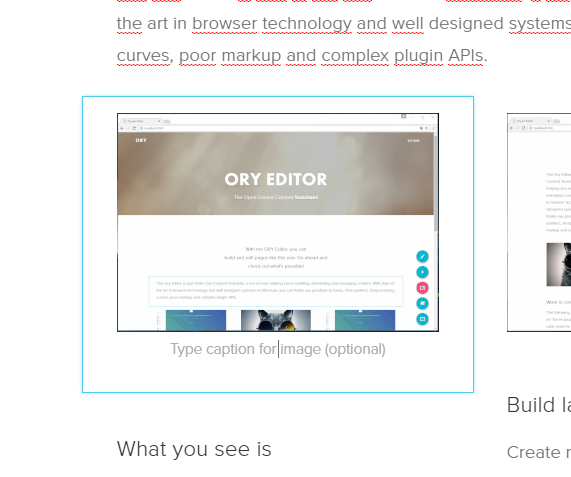
Core: ory-editor-core
The core is the main system of the ORY Editor. It contains the logic for creating and modifying layouts and is responsible for handling plugins.
Getting started
The ORY Editor uses a Redux store to manage the internal state. When creating a new Editor instance
import Editor from 'ory-editor-core'

const editor = new Editor()
the Redux store is created as well. Because of this, it is important to only instantiate the Editor once in your application lifetime (this is called the singleton pattern).
import Editor from 'ory-editor-core'

const editor = new Editor()
const editor2 = new Editor() // Don't do this.
Adding plugins
Now we know how to create an empty editor. Let's add some plugins as well. We will use plugins available from the ORY Editor repository. We call those plugins "ory plugins" because they are written and maintained by us.
Let's take an image plugin for starter. The image plugin is a simple content plugin that allows you to add an image by pointing the plugin to an image URL. It does not support uploading images at the moment.

To install the image plugin, we use npm: npm install ory-editor-plugins-image. Next, we need to add it
to our editor instance:
import Editor from 'ory-editor-core'

import image from 'ory-editor-plugins-image'
import 'ory-editor-plugins-image/lib/index.css'

const editor = new Editor({
  plugins: {
    content: [image],
  }
})
Let's start from top to bottom. First, we import the image plugin and the CSS required for it:
import image from 'ory-editor-plugins-image'
import 'ory-editor-plugins-image/lib/index.css'
We assume that you are running webpack with a plugin capable of importing CSS. If this confuses you, go to https://gitter.im/webpack/webpack and ask for help - they are very nice.
Next we create the editor instance and pass the image content plugin via the constructor.
const editor = new Editor({
  plugins: {
    content: [image],
  }
})
It is also possible to add/set/remove both layout and content plugins during runtime (meaning after creating the editor instance) as followed. Using these methods will force an editor re-render.
editor.addContentPlugin(image)
editor.removeContentPlugin(image)
editor.setContentPlugins([image])
Rendering
Next, we obviously want to render the editor. The core packages exports a ReactJS component called Editable. We assume
that our HTML looks something like this:
<!DOCTYPE html>
<html>
  <body>
    <div id="editable-1"></div>
    <div id="controls"></div>
  </body>
</html>
In that case, the javascript application will look something like this:
import React from 'react'
import ReactDOM from 'react-dom'

import Editor, { Editable } from 'ory-editor-core'

import image from 'ory-editor-plugins-image'
import 'ory-editor-plugins-image/lib/index.css'

const editor = new Editor({
  plugins: {
    content: [image]
  }
})

ReactDOM.render((
  <Editable editor={editor} />
), document.getElementById('editable-1'))
All we did was render the Editable component using ReactJS and passing the editor instance. There's however a problem
here - nothing will happen. This is because there is no content available to render. Let's change that!
Creating an empty state
To create an empty state, the core exports a method called createEmptyState. The result is a JSON object containing,
amongst others, a unique id.
import { createEmptyState } from 'ory-editor-core'

const editable = createEmptyState()
console.log(editable.id) // gives something like "29fb21c6-6e00-416f-a8e1-2be9fb84801c"
Adding this to the code from above we get:
import React from 'react'
import ReactDOM from 'react-dom'

import Editor, { Editable, createEmptyState } from 'ory-editor-core'

import image from 'ory-editor-plugins-image'
import 'ory-editor-plugins-image/lib/index.css'

const editable = createEmptyState()

const editor = new Editor({
  plugins: {
    content: [image]
  },
  editables: [editable],
})

ReactDOM.render((
  <Editable
    editor={editor}
    id={editable.id}
  />
), document.getElementById('editable-1'))
Note that we added id={editable.id} to <Editable>. This is required because we need to tell the component
which editable we want to render there, as we could also do:
ReactDOM.render((
  <div>
    <div className="left">
      <Editable editor={editor} id="1" />
    </div>

    <div className="right">
      <Editable editor={editor} id="2" />
    </div>
  </div>
), document.getElementById('editable-1'))
Saving and loading
Now that you know how to render an editor and fill it with an empty state, let's take a look at how saving and loading looks like.
You can catch changes using the onChange property of <Editable>. onChange accepts a function with a single
argument - the editable's state.
ReactDOM.render((
  <Editable
    editor={editor}
    id="1"
    onChange={(editable) => {
      console.log(editable)
    }}
  />
), document.getElementById('editable-1'))
The state you receive is a serialized version of the internal editor state. It contains primitive values (string, number, array, map) only and is safe to serialize to JSON.
Let's say you have a function called saveToBackend which stores your content in a database. You can call this method
from onChange:
ReactDOM.render((
  <Editable
    editor={editor}
    id="1"
    onChange={(editable) => {
      saveToBackend(editable)
    }}
  />
), document.getElementById('editable-1'))
To load the content, simply pass it to the constructor
const editable = loadFromBackend() // just an example

const editor = new Editor({
  plugins: {
    content: [image]
  },
  editables: [editable],
})

or use the `trigger` API.

```jsx
// const editor = new Editor( ...

const editable = loadFromBackend() // just an example

editor.editable.update(editable) // update adds an editable if it does not exist yet, or updates it when it exists in the store.